Digitizing one VHS tape is manageable.
Digitizing several is where things start getting complicated.
At first, it may seem like a simple repeatable task. You connect the equipment, capture the footage, save the file, and move on to the next tape.
But once you are dealing with a stack of tapes instead of just one, the problems change.
Now you are not only capturing video. You are also managing time, file naming, storage space, tape condition, playback issues, and the growing risk of confusion between one tape and another.
That is usually the point where a small preservation project starts to feel much bigger than expected.
The good news is that digitizing multiple VHS tapes does not have to become chaotic.
The key is not just getting the video off the tapes.
It is creating a process you can repeat without losing track of what you are doing.
The challenge is not only technical
When people think about VHS digitization, they often focus only on equipment.
They want to know which capture device to buy, which software to use, or how to connect the VCR.
Those questions matter.
But when you are digitizing multiple tapes, the bigger challenge is usually workflow.
You need a way to handle:
- several tapes in sequence,
- files that can become large very quickly,
- tapes with different conditions,
- uncertain labels,
- and the simple mental fatigue of repeating the same process many times.
Without a clear workflow, even a technically working setup can become messy fast.
Start by treating the project like a collection, not just a conversion task
This makes a bigger difference than people expect.
If you approach each tape as a random one-off job, you will probably end up with:
- inconsistent filenames,
- unclear saved files,
- missing notes,
- repeated captures,
- and uncertainty later about what has already been done.
A better approach is to treat the tapes as one archive project.
That means thinking ahead about:
- how you will name files,
- where you will save them,
- what order you will work in,
- how you will note tape condition,
- and how you will keep track of what is finished.
The capture itself is only part of the job.
The organization around it is what keeps the project usable.
Begin with a simple inventory
Before digitizing everything, make a basic list of the tapes you have.
It does not need to be fancy.
Even a simple handwritten list or spreadsheet can help.
You want to note things like:
- tape label,
- any date written on it,
- any visible event name,
- rough condition,
- and whether it has already been digitized.
This matters because VHS collections often contain uncertainty.
Some tapes are clearly labeled. Others are vague. Some may contain several recordings. Some may have handwriting that made sense years ago but is less useful now.
A simple inventory helps you stop guessing.
It also gives you a way to track progress once the project starts moving.
Work in a consistent order
When several tapes are involved, randomness creates confusion.
It is much easier to stay organized if you digitize in a clear order, such as:
- oldest to newest,
- shelf order,
- label order,
- or priority order.
The exact method matters less than consistency.
A repeatable sequence makes it easier to know:
- what has already been captured,
- what is still waiting,
- and whether something needs to be redone.
It also reduces the risk of duplicate work, which becomes more common than people expect once many tapes and many large video files are involved.
Use filenames that still make sense later
This is one of the most important habits in a VHS project.
If you digitize several tapes and save them with names like:
- tape1.mp4
- final_capture.mov
- vhs_new.avi
- familyvideo2.mp4
you are creating future confusion for yourself.
A better filename usually includes:
- a tape identifier,
- approximate date or year if known,
- and a short description if useful.
Something like:
VHS-03_1998_Birthday_Part1
or:
VHS-12_DateUnknown_FamilyTrip
is much easier to understand later.
The goal is not perfect archival naming. It is avoiding names that become meaningless as soon as the project gets larger.
Keep the storage structure simple from the start
The more tapes you digitize, the more important this becomes.
Do not let the files scatter across downloads, desktop folders, editing folders, and random external drives.
Create one clear location for the project.
For example:
VHS Digitization Project
├── Captures
├── Reviewed
├── Needs Review
├── Notes
This kind of structure makes the project easier to navigate while it is still in progress.
It also supports long-term organization later, especially if you eventually fold the finished files into a broader archive system like A Folder Structure That Still Works After 10 Years.
Expect some tapes to behave differently
One mistake people make is assuming every tape will digitize the same way.
They will not.
Some tapes play smoothly. Others may have:
- tracking problems,
- weak signal,
- unstable audio,
- physical wear,
- or long sections of blank material.
When you are digitizing multiple tapes, this variation becomes normal.
That is why it helps to build a process that allows for notes.
You may want to record things like:
- poor playback quality,
- damaged sections,
- tracking issues,
- incomplete capture,
- or uncertainty about the tape’s contents.
Those notes become useful later, especially if you need to revisit a tape or decide whether a second attempt is worthwhile.
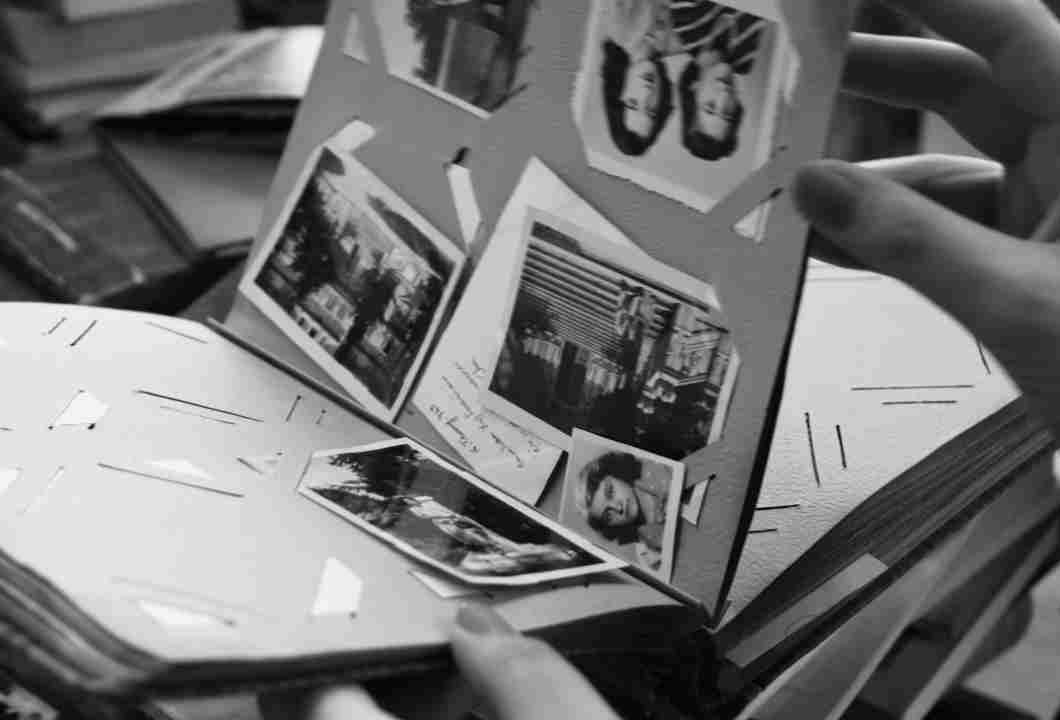
Do not assume the tape label tells the whole story
VHS labels are helpful, but they are not always reliable.
A tape labeled “Christmas 1997” might include:
- more than one event,
- footage from another year,
- blank space,
- later recordings,
- or clips that were added after the original label was written.
That is why it helps to think of labels as clues, not final truth.
When possible, capture with enough care that the saved file can be reviewed and named more accurately afterward.
The first handwritten label may not be the best long-term description.
Plan for large files before you start
Video files add up quickly.
That is easy to underestimate when you are looking at a pile of physical tapes instead of digital files.
Once digitization begins, storage can disappear faster than expected.
That means it is worth deciding in advance:
- where captures will be stored,
- how much free space you have,
- where backups will go,
- and whether you are keeping raw captures, edited versions, or both.
This is one reason VHS projects benefit from a stronger backup habit early on. A capture project can generate a lot of important material quickly, which is exactly when something like Backup 3-2-1 Explained Without Jargon becomes useful in practice.
Review as you go, not only at the end
When digitizing multiple tapes, it is tempting to capture everything first and review everything later.
That sounds efficient, but it often creates problems.
If there is an issue with:
- dropped frames,
- missing audio,
- corrupted files,
- bad naming,
- or incorrect capture settings,
it is much better to notice that early.
Reviewing as you go helps catch repeatable mistakes before they affect many tapes.
You do not need to watch every tape from beginning to end immediately, but it helps to check enough of each capture to confirm:
- the file saved correctly,
- audio is present,
- playback looks acceptable,
- and the name still makes sense.
Decide what counts as “done”
This sounds obvious, but it helps a lot.
When does a tape count as finished?
Is it when:
- the video is captured,
- the file is reviewed,
- the filename is cleaned up,
- the notes are recorded,
- or the backup is made?
If you do not define that, it becomes easy to mistake “captured” for “fully processed.”
A simple status system helps.
For example:
- captured,
- reviewed,
- renamed,
- backed up,
- complete.
That may sound a little formal, but it keeps larger projects from becoming vague halfway through.
Try not to fix everything at once
When people digitize old tapes, they often want to solve everything in one pass.
They want to:
- capture,
- trim,
- rename,
- improve quality,
- remove blank sections,
- label every event,
- and file everything permanently.
That is a lot.
A smoother process is usually:
- capture reliably,
- name clearly,
- store safely,
- review,
- then decide whether further editing is worth doing.
Preservation first, refinement second.
That order usually reduces stress and avoids losing momentum.
What to avoid
A few habits make multi-tape digitization much harder than it needs to be.
1. Saving files with vague names
This becomes confusing very quickly once several tapes are involved.
2. Working without a basic tape list
You are much more likely to lose track of what has been done.
3. Capturing everything before reviewing anything
That allows repeated mistakes to spread through the whole project.
4. Assuming tape labels are complete or accurate
They are useful, but not always reliable.
5. Letting project files scatter across devices and folders
That makes the project harder to manage and harder to back up.
Final takeaway
Digitizing multiple VHS tapes is not just about converting analog video into digital files.
It is about building a repeatable process that stays clear as the project grows.
A simple inventory, a consistent order, clear filenames, one project folder, and light review as you go can make the whole process much easier to manage.
The goal is not just to finish the tapes.
It is to end up with digital files that you can still understand, trust, and preserve properly afterward.